Estimated reading time: 15 minutes
Takeaways
- Understand the steps of Full Fibre Broadband Installation to prepare your home effectively.
- Fibre to the Premises (FTTP) installation requires professional work involving external and internal cable routing, ONT setup, and router configuration.
- Choose an appropriate router location that minimizes signal interference for optimal performance.
- The installation takes 2-4 hours, and expect some settling time for your service to stabilize post-installation.
- Follow troubleshooting tips and optimization strategies to enhance your broadband experience after installation.
Contents
Your full fibre broadband installation appointment is booked, but what actually happens on the day of broadband installation?
Understanding the process beforehand helps you prepare your home. Choose the best router location, and know exactly what the engineer will do. From now on, you’ll have a clear picture of each step for your fibre broadband service.
This guide walks you through everything you need to know about your full fibre broadband installation day in the UK. We’ll cover preparation steps, the three main installation stages, what happens during the engineer visit, as well as post-installation tips to optimise your new connection. Whether you’re moving to full fibre or upgrading existing service.
What is Fibre Broadband and Why Does Installation Matter?
Full fibre broadband represents a fundamental shift in how internet reaches your property. What gets installed and why it requires professional work helps you appreciate the technology coming into your home.
Understanding Full Fibre (FTTP) Technology
FTTP stands for Fibre to the Premises, sometimes called Fibre to the Home (FTTH) or simply full fibre broadband. These terms describe the same technology: a direct fibre optic cable connection running from the local exchange straight into your property.
The cables are made from thin strands of glass that transmit data using pulses of light instead of electrical signals. This fundamental difference allows fibre optic cables to carry significantly more data per second than traditional copper wiring. The light-based transmission method also makes these connections immune to electromagnetic interference. This means your broadband performs consistently regardless of external factors.
When providers install FTTP, they run weatherproof fiber optic cable from the exchange to a small white box inside your home called an Optical Network Terminal (ONT). This device converts the light signals from the fiber cable into data that your router can distribute throughout your property.
The Difference Between FTTP and FTTC
FTTC, or Fibre to the Cabinet, represents an older technology that combines two types of cabling. Fibre optic cables run from the exchange to the street cabinet. Then traditional copper telephone wires complete the connection from the cabinet to your home [4]. This hybrid approach limits performance because copper cables cannot match fibre’s capabilities.
The speed difference between these technologies is substantial. FTTC connections typically deliver maximum speeds of 76-80Mbps [3], whereas FTTP fibre broadband can provide speeds up to 900Mbps [4]. Some providers offering packages up to 2.2Gbps depending on location and eligibility. Upload speeds differ dramatically too, with FTTP providing symmetrical or near-symmetrical upload and download capabilities.
Distance affects FTTC performance because the further you live from your street cabinet, the slower your connection becomes [3]. FTTP eliminates this issue by maintaining fibre optic cable throughout the entire connection. In fact, full fibre connections experience far less buffering and slowdown during peak usage times [3]. This allows multiple household members to stream, game, and video call simultaneously without interruptions.
Reliability also distinguishes these technologies. Fibre optic cables are more resistant to damage from weather conditions that often affect copper wiring. The copper network supporting FTTC is being phased out across the UK, with Openreach aiming to complete the PSTN switch-off by 2030. Areas with full fibre coverage will gradually lose access to part-fibre services.
Why Professional Full Fibre Broadband Installation is Necessary
Unlike FTTC, which often uses existing copper infrastructure, FTTP requires a brand-new fiber optic cable connection directly to your property. Unfortunately, this physical work cannot be carried out remotely or through self-installation.
The full fibre broadband installation process involves bringing a fiber optic cable from the nearest network point to your home’s exterior, mounting it along walls, and possibly doing some groundwork if your connection runs underground. Engineers will then drill through an exterior wall to bring the cable indoors, install and configure the ONT [3], and connect your router to ensure everything works correctly.
This one-time setup delivers a future-proof connection. Once installed, you can upgrade or downgrade your broadband speed remotely without requiring another engineer visit. The physical infrastructure supports decades of use as technology evolves for your fibre broadband service.
Before Your Installation Day: What You Need to Know
Preparation makes the difference between a smooth installation and unexpected delays. Several steps occur before the engineer arrives at your door, and knowing what to expect helps you get ready properly.
Booking Your Full Fibre Broadband Installation Appointment
Your service provider handles the appointment booking process directly with Openreach for your broadband installation. When you place your order, you can select a date and appointment slot, choosing between morning or afternoon time windows, Monday to Friday. The installation takes around three hours, so someone over 18 must remain at your property throughout the entire appointment slot.
You’ll receive a confirmation email with your appointment date and time slot. Five days before and again two days before the installation date, most providers send SMS reminders. In some cases, Openreach may need to conduct a pre-visit to inspect underground cables or check if a telegraph pole can support the new fiber line. After any pre-visit work is completed, your actual installation will be scheduled within a few days. If you need to change your appointment, log into your provider’s order tracker using your account details or order reference and postcode [3].
Equipment You’ll Receive in Advance
Your new hub will be posted before the full fibre broadband installation appointment.. Keep it somewhere accessible because the engineer needs it to complete the setup. If you already own a BT Smart Hub 2, you’ll receive a welcome pack containing an Ethernet cable and leaflet instead.
For FTTP installations, you’ll also receive an Optical Network Terminal (ONT), which is the white modem box that provides your voice and broadband service. Additionally, providers supply a battery backup unit with four rechargeable batteries to keep your ONT working during power cuts. Your telephone or extension cable plugs into the ONT’s telephone socket, whilst your hub connects to the data socket.
Preparing Your Home for the Engineer Visit
The engineer will contact you before arriving to confirm the time and discuss access requirements. If you rent your property, obtain your landlord’s permission before the appointment because the installation requires drilling a small hole through your external wall. For flats or apartments, speak to your landlord or caretaker beforehand, as the engineer may need access to a services cupboard where your fibre connection enters the building.
Ensure someone over 18 stays present throughout the whole appointment slot [3]. Clear some space around the intended installation area so the engineer can work efficiently. In case our engineer needs access to the outside of your property for external work, make sure they can reach these areas.
Choosing the Best Router Location
Plan where you want your router before the appointment. The ONT and router both need positioning near a spare double power socket. A central location works best because the signal reaches each part of your home equally. Walls and objects slow down the signal, so fewer obstacles between the router and your devices means stronger performance.
Avoid placing the router in kitchens where metallic objects like freezers and microwaves can interfere with the signal. Keep it away from fish tanks, mirrors, and water heaters because water dampens signal strength whilst mirrors reflect and distort it [5][5]. Elevate the router on a shelf rather than leaving it on the floor, as Wi-Fi signals travel downwards. Maintain around 5 feet distance from other electronics like TVs, radios, and wireless phones to prevent interference. Don’t position the router in cupboards, spare rooms, or near windows, as these locations either block the signal or allow it to escape outside.
The Three Main Steps of Full Fibre Broadband Installation
The broadband installation follows a systematic three-stage process. Each stage builds upon the previous one to establish your full fibre connection.
Step 1: External Fibre Connexion to Your Property
The engineer brings a fibre optic cable from the nearest network point to your home’s exterior as part of your broadband installation. This network point could be an overhead telegraph pole. It could also be an underground chamber. This will depend on how your area’s infrastructure set up.
For overhead installations, the cable runs from the pole to your property. It is mounted neatly along the outside wall.
Underground connections pull fibre through existing ducts. This may need a small amount of digging. It depends on where the duct is.
The engineer explains where and why any digging is needed [5].
Following the cable routing, the engineer installs a small external junction box on your outside wall. This box protects the fibre cable entry point and prevents future broadband issues [5]. The engineer may drill two additional holes if working from a pole, solely for ladder safety purposes [8]. These additional holes will get repaired afterwards, leaving no visible trace of the work.
Step 2: Internal Installation and ONT Setup
Once external work is complete, the engineer drills a small hole through your exterior wall to bring the fibre cable indoors. This hole measures 10mm to 12mm wide, and you can indicate where you’d like it positioned.
After feeding the cable through, the engineer installs the Optical Network Terminal (ONT) on your indoor wall. The ONT turns light signals from the fibre cable into data that your router can use. The unit needs constant power because it runs your internet connection. For this reason, it is placed near your chosen power socket.
The engineer checks that the ONT displays the correct status lights and confirms the signal remains stable. This verification ensures the fibre connection is functioning properly before proceeding to the final stage.
Step 3: Router Configuration and Testing
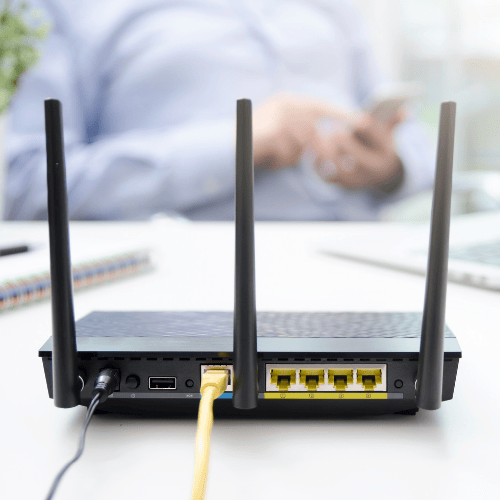
The engineer connects your router to the ONT using an Ethernet cable. This cable typically has white casing with yellow ends and plugs into the WAN port (usually red) on your router’s back panel. The other end connects to LAN 1 port on the ONT [10].
After powering on the router, the engineer tests connection stability, speed performance, and device connectivity. Speed tests confirm you’re receiving the speeds included in your package. The engineer also verifies that the router transmits a proper Wi-Fi signal, then demonstrates how everything works before completing the installation.
What Happens During the Engineer Visit
The engineer arrives within your scheduled time slot, but the first contact happens slightly earlier.
The Engineer’s Arrival and Initial Assessment
Before arriving at your property, the engineer rings you to confirm they’re on their way and discuss any access restrictions you may have. This call gives you a final opportunity to mention anything the engineer should know about reaching external areas of your home.
Upon arrival, the engineer will show you the possible route for the fibre cable. This route will connect your property to the network. You will discuss and agree where to drill the hole for the indoor cable. If the engineer needs to dig or drill, you will be asked to sign a form. This permission to work form gives formal consent.
Drilling and Cable Routing Process
The engineer runs the fibre optic cable from a nearby telegraph pole or an underground chamber.
They connect it to a small junction box on your outside wall [3]. At this stage, they may drill a few extra holes outside for ladder safety. These safety holes are repaired later. The engineer also cleans up well, so you will not notice them [3].
The engineer carefully marks the agreed drilling point. They then drill a small hole through your outside wall to feed the fibre cable inside.
Installing the Optical Network Terminal (ONT)
Following the external work, the engineer needs access inside your property. They will fit the internal equipment. The ONT is a white box. It connects the fibre optic cable; provides access to the full fibre network; will be wall-mounted near your chosen power socket.
The ONT must be close to where your router will sit [3].
Connecting and Setting Up Your Router
The engineer connects your router to the ONT, then links your main device to the new router. Before the engineer arrived, your old service was disconnected and the new one connected at the street cabinet.
Final Tests and Handover Full Fibre Broadband Installation
Once everything is connected, the engineer runs tests to verify connection stability and speed performance. They demonstrate that your fibre service is working properly and ensure any devices you had connected previously still function. Most installations take between two and four hours, though this varies depending on property type and how the fibre gets routed.
After Installation: Getting the Most from Your Connexion
The engineer has left, but your connection may need time to reach full performance.
Troubleshooting Common Post-Installation Issues
Your broadband service can take up to midnight on activation day to start working [8]. Following the initial connection, expect an hour or so for the service to settle down [8]. You may experience intermittent connectivity during this period whilst the exchange automatically tests different speeds to find the fastest stable performance your line supports. Speed variations and brief disconnections are normal for up to ten days afterwards. Keep your router powered on continuously so tests can complete properly.
Check the ONT lights if problems persist. A flashing green PON light indicates an exchange-level issue that requires provider intervention link. Solid green means the connection functions correctly.
Optimising Your Wi-Fi Coverage
Update your router’s firmware regularly for performance improvements and security fixes. Hardwire bandwidth-heavy devices like 4K televisions and gaming consoles via Ethernet cables to reduce network congestion and free up wireless capacity for other devices. This dedicated connection typically delivers faster, more stable speeds.
For larger properties with weak signal areas, mesh systems extend coverage more effectively than range extenders. Position mesh units halfway between your router and dead zones.
When to Contact Support
Contact your provider if the hub shows a solid orange light after installation, as this suggests activation problems. Similarly, missing voice service with no green light on the hub requires provider investigation. Persistent connection drops beyond the settling period warrant professional diagnosis.
Conclusion
Your fibre installation day may seem complex at first glance, but at length, it follows a straightforward three-stage process that delivers a future-proof broadband connection. The engineer handles everything from external cable routing to ONT installation and router configuration, typically completing the work within two to four hours.
Remember to prepare your property beforehand, choose your router location wisely, and keep the equipment powered on during the ten-day settling period. As long as you follow the optimisation tips and understand what’s normal during those first days, you’ll enjoy reliable, lightning-fast speeds.
Your full fibre broadband is ready. Welcome to the next generation of connectivity.
Q&A
Question: What’s the difference between FTTP (full fibre) and FTTC, and how will it affect my speeds and reliability?
FTTP runs a fibre optic line all the way into your home, while FTTC uses fibre to the street cabinet and copper from there to your property. FTTC typically tops out around 76–80 Mbps and slows the farther you are from the cabinet. FTTP can deliver up to 900 Mbps (and some packages up to 2.2 Gbps, where available) with symmetrical or near-symmetrical upload speeds. Because fibre uses light rather than electrical signals, it’s immune to electromagnetic interference and doesn’t degrade with distance, so it’s more reliable and consistent—especially at busy times. The copper-based network that supports FTTC is also being phased out, with the PSTN switch-off targeted by 2030.
Question: How should I prepare my home and what should I have ready before the engineer arrives?
Make sure someone over 18 is home for the whole appointment (typically 2–4 hours). If you rent, get your landlord’s permission because a small hole will be drilled through an external wall; in flats, arrange access to any building services cupboard. Clear space where the equipment will go and ensure the engineer can reach outside areas. Your hub will be posted in advance (keep it handy). For FTTP, you’ll also receive an ONT and a battery backup unit with four rechargeable batteries; your phone plugs into the ONT’s telephone socket and your hub connects to the data socket. Decide on a suitable spot near a double power socket for both the ONT and router before the visit.
Question: What exactly happens during the installation visit?
The engineer calls ahead, then on arrival agrees the cable route and drilling point with you (you may be asked to sign a permission-to-work form). Externally, they run fibre from a telegraph pole or underground chamber to your wall, fit a small junction box, and may drill a couple of temporary safety holes for ladder work (these are repaired). They then drill a 10–12 mm hole through your wall to feed the fibre indoors, mount the ONT near your chosen power socket, and check the signal lights. Finally, they connect your router to the ONT (WAN on the router to LAN 1 on the ONT), test speed and stability, confirm Wi‑Fi works, and show you everything. Most installs take 2–4 hours.
Question: Where should I place my router (and ONT) for the best Wi‑Fi coverage?
Put both near a spare double power socket, with the router centrally located, elevated on a shelf (Wi‑Fi tends to travel downward), and with as few walls/obstacles as possible. Avoid kitchens (metal appliances can interfere), fish tanks, mirrors, and water heaters (water and reflective surfaces weaken or distort signals). Keep about 5 feet from TVs, radios, and cordless phones. Don’t hide the router in cupboards, spare rooms, or near windows, where signal gets blocked or leaks outside.
Question: My broadband isn’t stable right after installation—what’s normal, and when should I contact support?
Service can take until midnight on activation day to come online, then about an hour to settle. Variations in speed and brief drops can be normal for up to 10 days as the line optimises—keep your router powered on throughout. If problems persist, check the ONT: a flashing green PON light points to an exchange-level issue that your provider must fix; solid green means the fibre link is fine. Contact your provider if your hub shows a solid orange light after install, if voice service is missing (no green light), or if dropouts continue beyond the settling period. For better coverage, keep firmware updated, wire bandwidth‑heavy devices via Ethernet, and consider a mesh system for larger homes.
Related links
See how Broadband Freedom can help you, click here to check your postcode